
The most delicious homemade cinnamon raisin bread baked to perfection in a hot dutch oven! It has a doughy inside with sweet raisins and cinnamon, and a crunchy outer crust.
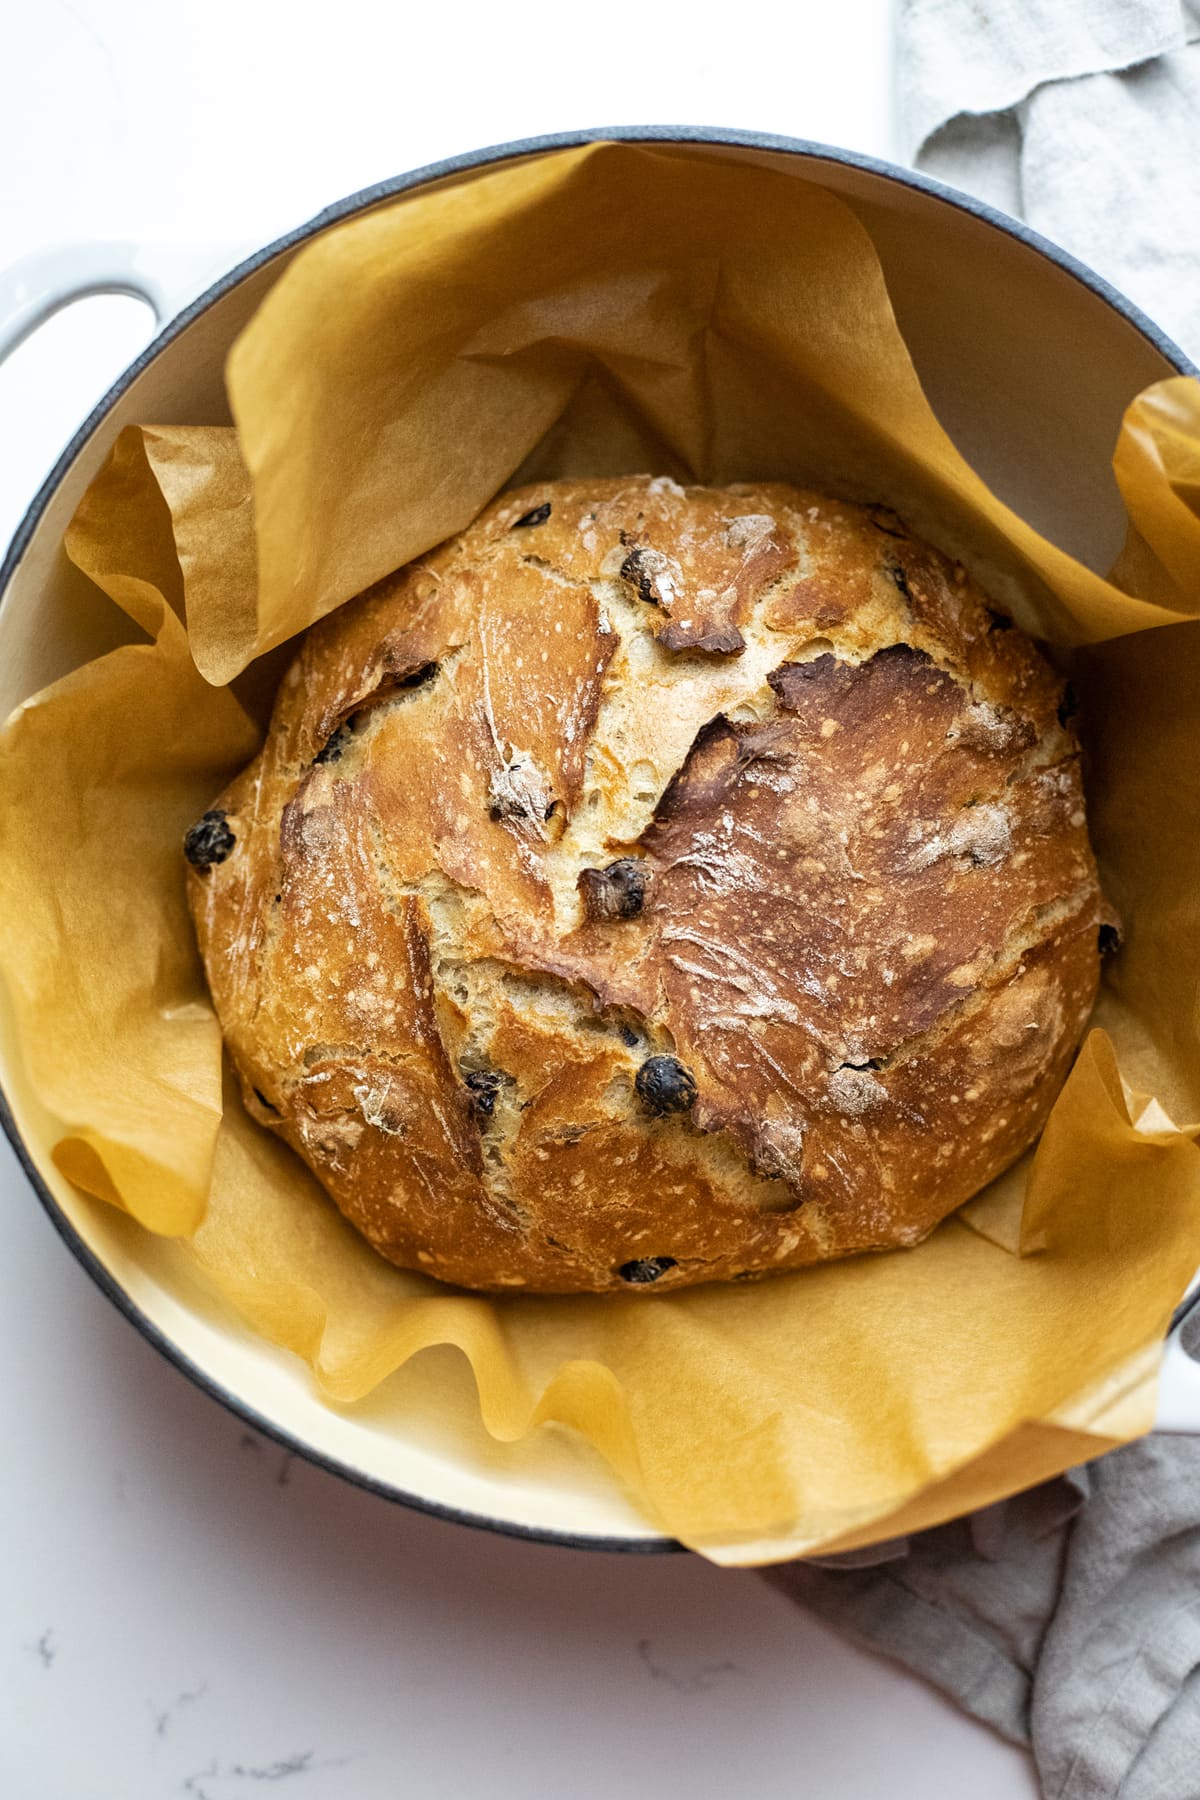
There is nothing quite like homemade bread. Especially this perfectly sweet cinnamon raisin bread. It has a light and crunchy crust, with a doughy inside, and it’s of course studded with perfectly sweet raisins. We love toasting this bread with butter or our recommended cinnamon honey butter for complete perfection!
For this recipe, all you’ll need is 1-bowl for mixing, a dutch oven pot, and a little over 30 minutes for the bread to bake. It’s EASY, so so tasty, and freezer-friendly.
Let’s get baking!
How to Make Cinnamon Raisin Bread
-
1
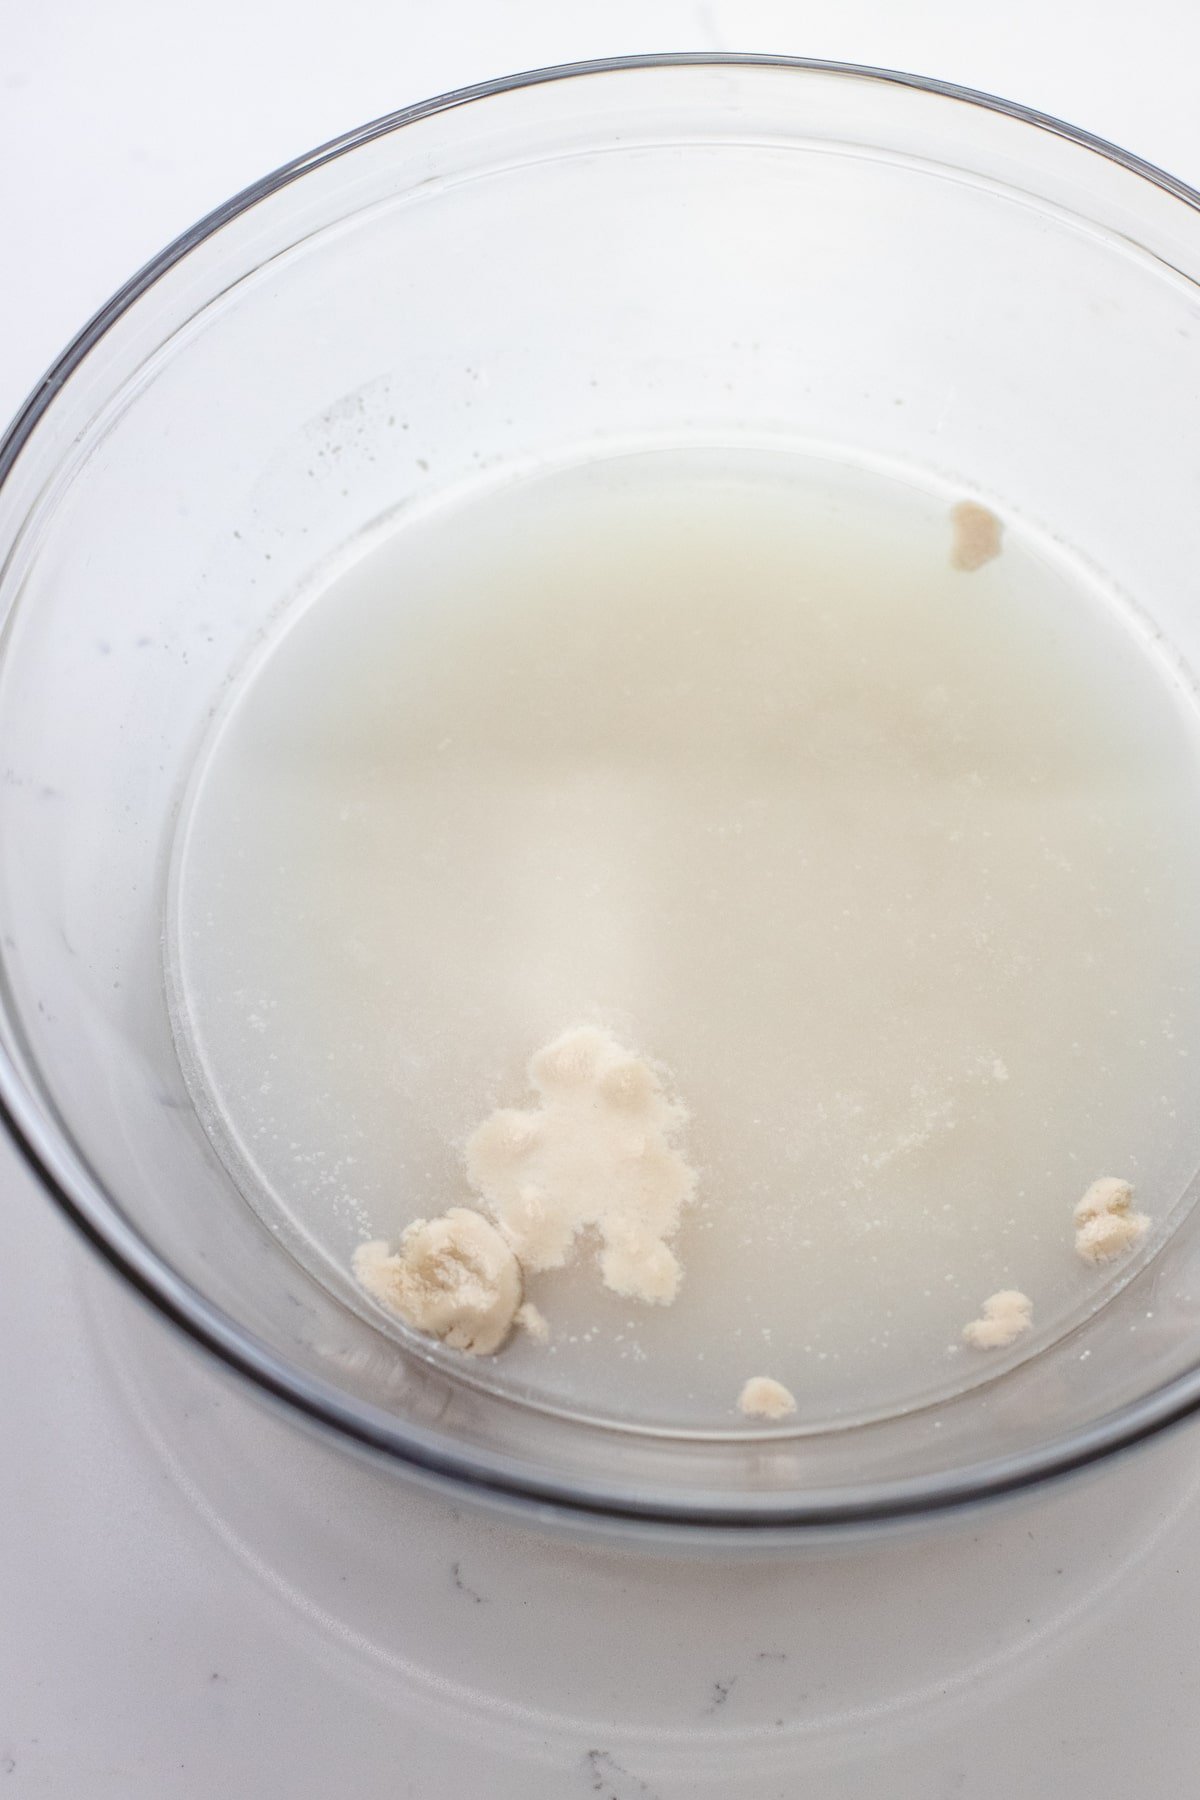
Activate the yeast with warm water.
-
2
Add rest of ingredients and stir until dough is sticky.
-
3
Place the dough on a floured surface then shape with hands into a ball. Place in a greased bowl, cover with a damp towel in a warm place and let rise for 3+ hours or until doubled in size.


-
4
Remove risen dough and use just enough flour on your hands and on the surface to form it into a ball.
-
5
Place on parchment paper then use edges of the paper to lift into the dutch oven. Cover and bake at 450F for 30 minutes, remove the lid and bake until golden brown on top (another 5-10 minutes).

Tools You’ll Need
- Kitchen Aid electric mixer with a dough hook (optional, but recommended)
- Cast iron pot

Our favorite dutch oven pot
We recommend a 6 Qt dutch oven pot for this recipe because it creates high & stable temperatures that are ideal for bread making. We love Lodge cast iron because they are quality cast iron and affordable! We use it with bread making, soups, popcorn, and so much more.
If you click this link and make a purchase, we may earn a commission at no additional cost to you.Tips for Success
- Use your oven to proof the dough: whenever dough needs to rise, it’s best to let it sit in a consistent and controlled climate. I prefer using my oven with the light on (oven settings are off). This creates a consistent temperature while the oven light develops a small amount of warmth to encourage the dough to rise.
- Freeze it: Let the bread cool and store in a freezer-friendly bag (press all the air out) and freeze for 1-2 months. Let thaw at room temperature and reheat in the oven at 350F until warm.
- Tips if preheating dutch oven: this recipe doesn’t call for preheating your dutch oven, but if choose to do this I recommend doing a double layer of parchment paper to ensure the bottom of the bread doesn’t get too brown.
- Easy cinnamon honey butter recipe: Make delicious and slightly sweet honey butter to spread on your homemade bread. You’ll need 1 tsp honey, a pinch of cinnamon, 3 tbsp room temperature butter – mix together in a small bowl and spread on your bread when done. SO good.
Baking with Yeast
Active dry yeast: You’ll need to take different steps when baking bread with different yeasts. If you have active dry yeast on hand, you will need to activate it in water before adding flour (this step is included in the instructions).
Instant yeast: If you have instant yeast, you can skip dissolving it in water and stir it into your dry ingredients before adding water. Instant yeast has super small granules compared to active dry yeast so it does not need to be activated in water first.

If you love this cinnamon bread, you might also be a fan of our cranberry walnut bread! Equally as delicious and just as easy to make.

Cinnamon Raisin Bread Recipe
Ingredients
- 3 1/4 cups all-purpose flour
- 1 1/2 cups warm water
- 2 teaspoons active dry yeast
- 3 Tablespoons brown sugar
- 3/4 teaspoon salt
- 2/3 cup raisins
- 2 teaspoon cinnamon
Instructions
- Make the dough: In an electric mixer add warm water, sugar, and yeast. Stir and let sit for 5 minutes for yeast to activate tip: sugar feeds yeast so I include it in this process. Add raisins, cinnamon, flour, and salt. Use bread mixing attachment and mix together until dough forms. If dough is too wet or dry, add water/flour 1 Tbsp at a time until right consistency.
- Let it rise: Toss dough on lightly floured surface, place in lightly greased bowl. Cover with a damp dish towel and let sit in a warm area for 3+ hours. Dough should be doubled in size. Tip: I like placing my dough in the oven with the light on (oven is off). This helps create a consistent climate for the dough while the light creates a small amount of warmth to help it rise.
- Preheat oven to 450F.
- Transfer dough: Place dough on lightly floured surface and form into ball again (keep lightly flouring your hands to prevent sticking). Lay dough on parchment paper, lightly dust paper to prevent sticking, and lift edges of paper to transfer dough into dutch oven.
- Bake: Cover with lid and bake for 30 minutes, uncover and bake for 5-10 more minutes until golden brown.
- Let it cool: Remove and let bread cool for 20 minutes before slicing.
Do you have a Dutch oven artisan bread recipe that’s no knead quick proofing?
I do not! But you could use a no knead recipe and just add the ingredients from this bread to it. 🙂
The cinnamon raisin bread is fantastic I just made French toast with it this morning😊
That’s a wonderful idea! So happy to hear you enjoyed it 🙂
what is the best size dutch oven to use? (diameter)
You can go as small as a 4 quart size!
What should you bake in if you don’t have a Dutch oven? A regular pot with lid?
I’ve not tried anything other than cast iron – but a regular pot should still get hot enough!
I have a copper chef pot with a lid that I’ve been using for all my rustic & artisan breads & they come out fantastic. They can take high heat up to 500 degrees.
I followed the recipe exactly, including using my 4.5 qt dutch oven. My loaf came out flat and wide. The loaf was only 2 1/4 inches high. 🙁 My yeast and flour were recently bought, the dough doubled and rose beautifully. But as soon as I gently turned it out onto the parchment paper, it lost it’s shape and spread. It stayed that shape through baking. The bread itself was truly delicious though. But I am thinking that next time I will try to get a second rise before putting it in the oven.
I’m so sorry to hear that! I’m not exactly sure what the problem could be. If you are located in an area with elevation that can always be a factor. But other than that I’m not sure since your ingredients were new!
Mine did the same thing….seemed to have rose like it should have, but then when I removed from the bowl to put in the dutch oven, flattened right out! Still cooking it to see how the flavor it. My yeast was a little older, bought in April.
Wendy, have you thought about or are you aware of proofing baskets? I just recently started using them and it eliminates this issue. At times if there is too much liquid the dough spreads.
This was easy to make, fast and dee-lish!!
So happy to hear!
Does this bread get a second rise after it’s on parchment paper and in Dutch oven, before it gets baked?
no second rise is needed!
What if you don’t have dough attachment ?
a wooden spoon and a bowl will work just fine instead. 🙂
Love this bread! Just started making bread about 4 months ago. Finally felt confident to try something other than white bread after I “mastered” it. This was a winner on the first try! I may add a little more cinnamon and raisins to the next batch, but perfect bread consistency. The house smelled gorgeous while it was baking! Thank you!
Thanks so much, Ryan! Making bread is always a fun adventure. And the more cinnamon and raisins the better in my mind! Glad you enjoyed this recipe. 🙂
Easiest bread recipe to make. Very moist inside, crunchy on the outside. After proofing it for 3 1/2 hrs, when I turned it out onto the countertop to shape, it didn’t get any higher. But, it cooked fine, bottom didn’t burn. So.. we’re all very happy with the way it came out…tasty!! Thanks Bethany
Thank you, Madee! I’m so glad to hear that! 🙂
Very easy to make and tasted wonderful when all baked. I’m accustomed to measuring flour by weight so I had to guess how to measure it. Spoon in and level or scoop and level? Because I opted for spoon in and level, I had to add a lot of extra tablespoons of flour, well over 10. Will I make it again? Yes but I’ll try the scoop and level next time.
There are conversion charts on Pinterest for cups to grams/ounces 😉
Yes Janie, I as well had the same result as I plumped my raisins prior to adding them. Scoop and level is best for bread. Spoon in and level is typically for cakes.
Looks amazing! Tastes great!
awesome!
Soooo good. Soft, moist and really easygoing!
yay!
This was the easiest and tastiest bread I have ever made!! Really.. I added walnuts and it is so good! Will make many times, my son loved it too. If anyone is thinking about trying it, go for it. I can’t say it enough, so easy!!!
Thank you Judy! So happy to hear you enjoyed it. Love the addition of walnuts. I’ll have to try that next time! 🙂
Should the dough rest a second time, after it’s been formed but before baking?
And should the Dutch oven be preheated before putting the dough in? Thanks
I don’t recommend preheating the dutch oven, this can result in the bottom of the bread being burned.
If your dutch oven is enamelled, it is recommended to preheat it with the oven to prevent cracking. I have read that putting a layer of loose flour in the bottom of the pot (before adding the dough in the parchment) will help reduce chancing of burning.
Thanks for the tip Terry! That’s great to know. 🙂
This came out lovely!
Yay! 🙂